LAMP Install
Linux(Ubuntu Server) / Apache / MySQL / PHP
OS
Install Unbuntu Server
Configure SUDO
sudo visudo
REMOVE
root ALL=(ALL:ALL) ALL
ADD
USERNAME ALL=(ALL:ALL) ALL
NOTE: Change username
SAVE & EXIT
Configure User Session Timeout
Create a new file called autologout.sh
sudo nano /etc/profile.d/autologout.sh
Add the following lines:
TMOUT=1800
readonly TMOUT
export TMOUTSAVE & EXIT
Make it executable
sudo chmod +x /etc/profile.d/autologout.sh
Harden SSH
Backup sshd_config
sudo cp /etc/ssh/sshd_config /etc/ssh/sshd_config_BAK
Deny root ssh logon
sudo nano /etc/ssh/sshd_config
UPDATE:
PermitRootLogin no
SAVE & EXIT
Restart SSH server
sudo systemctl restart sshd
Open SSH port in firewall, but not enable it yet
sudo ufw allow ssh
Update OS
sudo apt-get update && sudo apt-get upgrade
sudo apt-get update && sudo apt-get dist-upgrade
Restart server
sudo reboot
Lid close action, do nothing(OPTIONAL)
Run a personal linux server on a laptop, you bet. Great use of older hardware.
sudo nano /etc/systemmd/logind.conf
Uncomment & UPDATE: HandleLidSwitch=ignore
SAVE & EXIT
Restart login service
sudo systemctl restart systemd-logind.service
Update server hostname
sudo nano /etc/hostname
UPDATE:
hostname
SAVE & EXIT
Reboot server
sudo reboot
Install Apache
sudo apt-get update
sudo apt-get -y install apache2
sudo systemctl enable apache2
sudo systemctl start apache2
Check Apache version
sudo apache2 -v
Output
Server version: Apache/2.4.41 (Ubuntu)
Server built: 2020-08-12T19:46:17Enable, Configure and Start UFW Firewall
sudo ufw enable
sudo ufw allow in "Apache Full"
sudo ufw reload
Install MySQL
sudo apt-get -y install mysql-server
Secure the MySQL installation with the following command
sudo mysql_secure_installation
Answer questions to your preference.
Check MySQL version
mysql --version
Output
mysql Ver 8.0.22-0ubuntu0.20.04.2 for Linux on x86_64 ((Ubuntu))
Add User
sudo mysql
CREATE USER 'NEWUSER'@'localhost' IDENTIFIED BY 'PASSWORD';
GRANT ALL PRIVILEGES ON * . * TO 'NEWUSER'@'localhost';
FLUSH PRIVILEGES;NOTE: Change NEWUSER and PASSWORD
Install PHP
sudo apt-get install php php-mysql libapache2-mod-php
sudo systemctl restart apache2
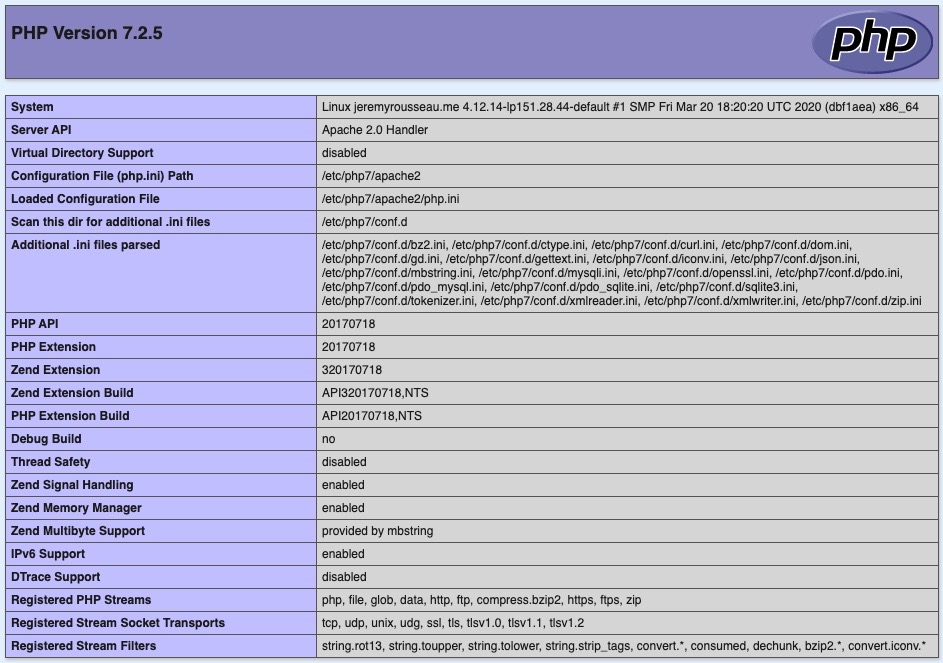
Verify PHP installation information by creating a PHP test file
phpinfo() will display installed and configured PHP options.
echo "<?php phpinfo(); ?>" | sudo tee /var/www/html/info.php
Open a web browser and navigate to the address: http://SERVER_IP/info.php
Verify the PHP configuration details
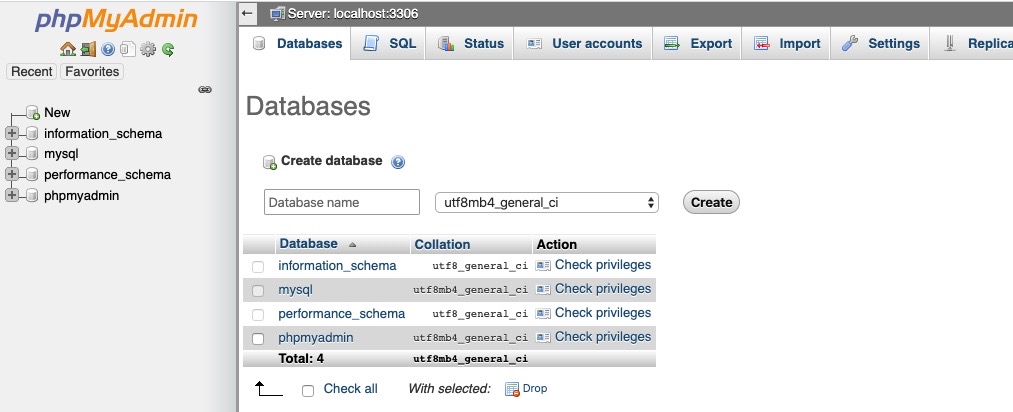
Install phpMyAdmin
phpMyAdmin is a browser based tool to administer your database. phpMyAdmin site.
sudo apt-get -y install phpmyadmin php-mbstring
sudo phpenmod mbstring
sudo systemctl restart apache2
Test phpMyAdmin
Open a browser to http://SERVER_IP/phpmyadmin
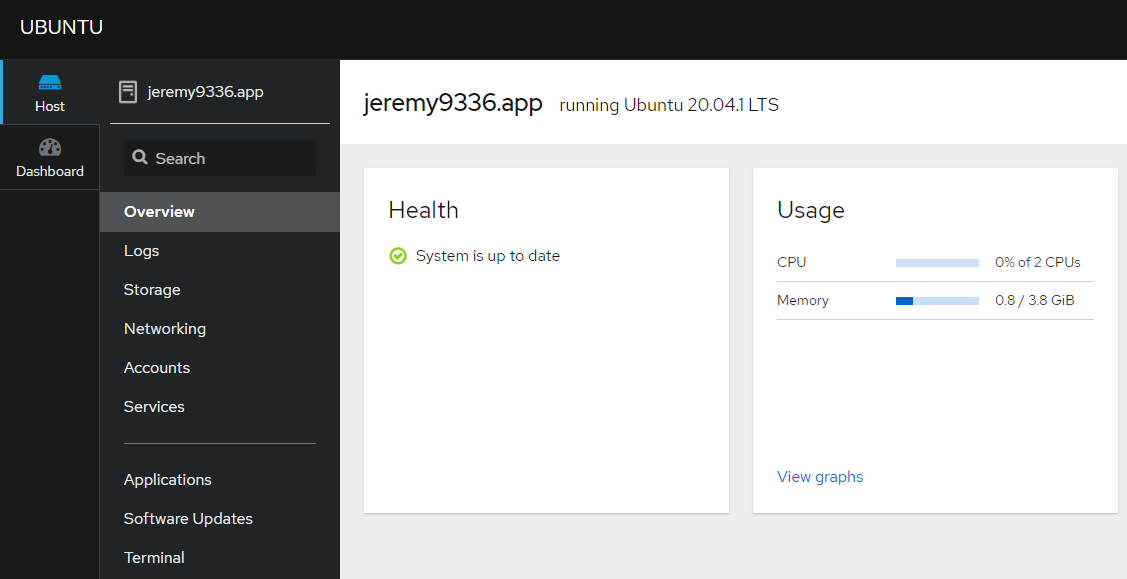
Install Cockpit
Cockpit is a browser based tool to help administer many server aspects. Cockpit site.
Install Cockpit
sudo apt-get -y install cockpit
Change port Cockpit listens on
sudo nano /lib/systemd/system/cockpit.socket
UPDATE: ListenStream=8888
Open firewall for Cockpit
sudo ufw allow in "8888"
sudo ufw reload
Reboot server
sudo reboot
Test Cockpit
Open a browser to https://SERVER_IP:8888
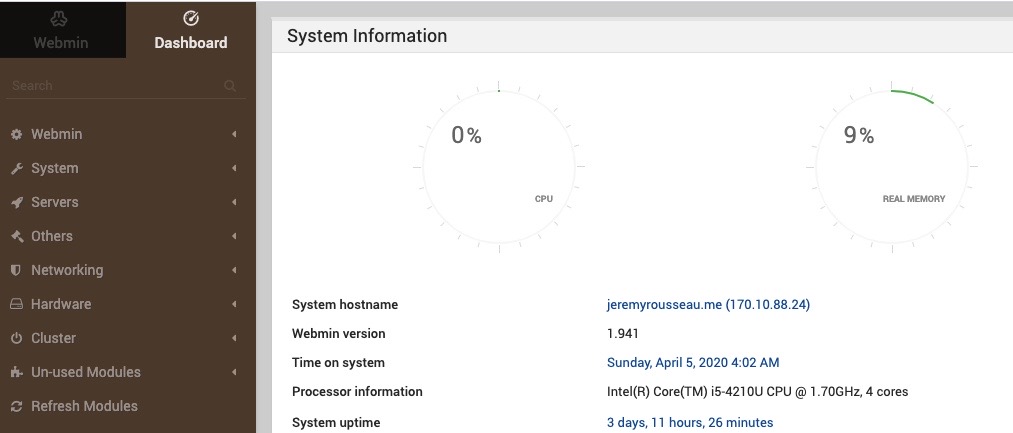
Install Webmin
Webmin is a browser based tool to help administer many server aspects. Webmin
Add a new repository to /etc/apt/sources.list
sudo nano /etc/apt/sources.list
ADD:
"deb http://download.webmin.com/download/repository sarge contrib" to the end of the file.
Download the Webmin PGP Key
wget -q -O- http://www.webmin.com/jcameron-key.asc | sudo apt-key add
Install Webmin
sudo apt-get update && sudo apt-get -y install webmin
Change port Webmin listens on
sudo nano /etc/webmin/miniserv.conf
UPDATE:
port=9999
Restart Webmin
sudo /etc/init.d/webmin restart
Open firewall for Webmin
sudo ufw allow in "9999"
sudo ufw reload
Test Webmin
Open a browser to https://SERVER_IP:9999
SSL(Optional)
Enable SSL
sudo a2enmod ssl
Prepare SSL Cert(Optional)
Generate a Certificate Signing Request
openssl req -new -newkey rsa:2048 -nodes -keyout YOURDOMAIN.key -out YOURDOMAIN.csr
Enter CERT information
Country Name (2 letter code) []:US
State or Province Name (full name) [Some-State]:YOUR STATE
Locality Name (eg, city) []:YOUR CITY
Organization Name (eg, company) []:SOME COMPANY
Common Name (e.g. server FQDN or YOUR name) []:DOMAIN.NAME
NOTE: For email address and optional company name, press ENTER to leave them blank as these are legacy fields.
Install SSL Cert(Optional)
This varies based on server and local configuration and not required for self-signed certs.
Create Virtual Host
Create new virtual host file for your DOMAIN
sudo cp /etc/apache2/vhosts.d/vhost-ssl.template /etc/apache2/vhosts.d/DOMAIN.conf
UPDATE DOMAIN.CONF
sudo nano /etc/apache2/vhosts.d/DOMAIN.conf
DocumentRoot "/var/www/html"
ServerName www.example.com:443
SSLEngine on
SSLCertificateFile /etc/apache2/PATH/DOMAIN.crt
SSLCertificateKeyFile /etc/apache2/PATH/DOMAIN.key
SSL Help
Update Logon Banner
Add a custom banner when you logon with SSH
Install Figlet
sudo apt-get install figlet
Create a bash script to run figlet at logon to display some text and make it executable
sudo nano /etc/profile.d/99-logon.sh
Update 99-logon.sh
sudo /etc/profile.d/99-logon.sh
Add the following lines:
#!/bin/sh
hostnamectl
echo " "
figlet HOSTNAME -t
echo " "
uptime
echo " "
SAVE & EXIT
Make executable
sudo chmod +x /etc/profile.d/99-logon.sh